
The Complete Guide to a Minimalist Kitchen: Design, Organization & Mindful Essentials
A minimalist kitchen isn't an empty one. Here's how to build a calm, intentional kitchen that still works hard for people who actually cook every day.
16 min read
Practical organization ideas for small kitchens: how to use vertical space, deep drawers, and the hidden corners most people ignore, and keep a tiny kitchen calm and functional without buying a lot of bins.
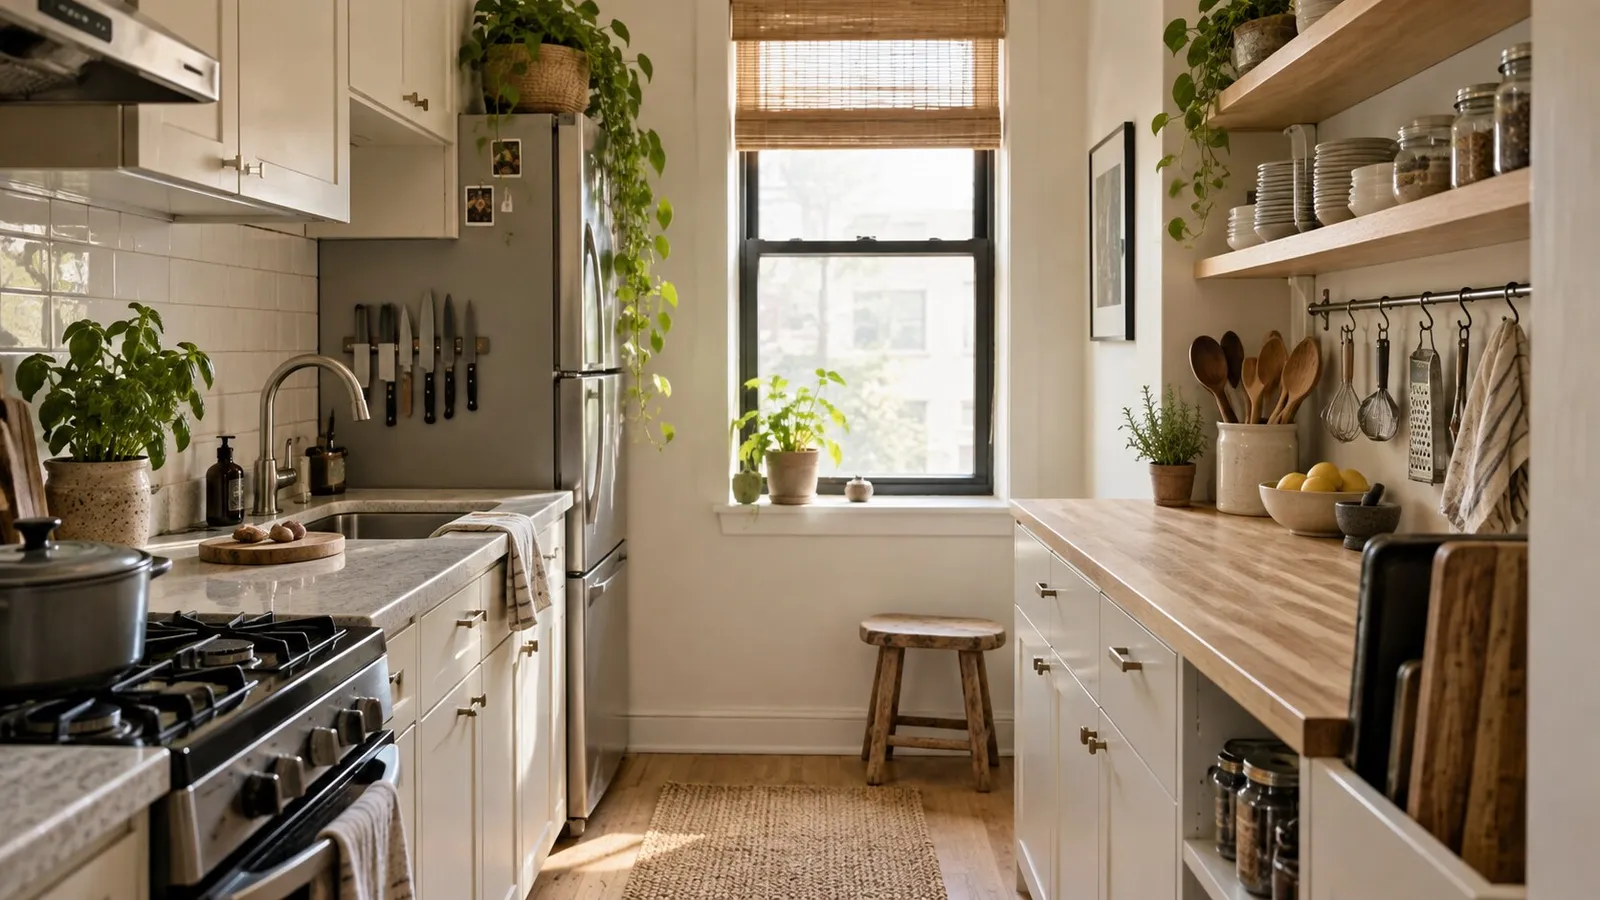
Editorial image for illustration; not a product-testing record or a documented kitchen project.
Some links may earn Zen Kitchen a commission if you buy, at no additional cost to you. Our evaluations are based on published sources. Read our affiliate policy.
The small kitchen organization ideas that actually work share one thing: they come after editing, not before. Cut what you own down to what you use, then store it by task, near where the task happens, using the space you already have: walls, cabinet doors, the insides of drawers, and the awkward gaps above and below everything. Bins come last, and only to hold something you’ve already decided to keep.
That order is the whole difference between a small kitchen that feels calm and one that feels like a storage unit with a stove.
Below are the ideas we’d actually use, grouped by where they go, with an honest note on when each one works and when it quietly makes things worse.
The most common small-kitchen mistake is shopping for organizers before deciding what needs organizing. It feels productive. It usually adds clutter, because containers take up space of their own and make it easy to keep things you’d otherwise let go.
So before you buy anything:
In a small kitchen, every item takes space from something else. The best organizer is usually the thing you no longer own.
In a small kitchen, floor and counter area are fixed. Wall height usually isn’t fully used. This is where most of your new capacity comes from.
A magnetic knife strip. Moves knives off the counter and out of a drawer, freeing both. Mount it away from the stove and out of the reach of small children. Works when: you have a short stretch of wall or backsplash near your prep area. Fails when: it becomes a catch-all for scissors, bottle openers, and metal spatulas. Keep it to knives.
A rail with hooks. A single stainless rail under the upper cabinets or along the backsplash holds your most-used utensils, a ladle, tongs, and a small pan or two. Works when: you hang only three to six things you use daily. Fails when: it holds fifteen things and the wall becomes visual noise. Anything on a rail is on display, so treat it like a shelf you have to look at.
One open shelf, not three. A single floating shelf above the counter can hold everyday dishes or a few jars and makes a tight kitchen feel lighter than another upper cabinet would. Works when: the items on it are used daily (so they don’t gather dust and grease) and share a color or material. Fails when: it becomes a display of mismatched mugs and stray packaging. For styling it the Japandi way, see our Japandi kitchen design guide.
Pegboard. A painted or wooden pegboard is flexible and renter-friendly if it’s freestanding or mounted with minimal holes. Works when: you use it for pans and tools you’d otherwise stack. Fails when: the layout never settles and it looks perpetually half-finished.
A wall-mounted pot rack. Frees an entire base cabinet in some kitchens. Works when: your pans look good and you use them all. Fails when: ceilings are low or the pans are heavy and the wall is drywall without studs where you need them.
Most cabinets are built with one fixed shelf and a lot of air. The goal is to use that air without creating stacks you have to dig through.
Shelf risers. A simple wire or wooden riser turns one layer of plates or mugs into two. This is one of the few organizers we’d recommend almost universally. Works when: you store short items (mugs, bowls, small plates, spices). Fails when: you use them in deep cabinets where the back row disappears.
Store pans and lids vertically. A file-style rack or a few tension rods turn a stack of skillets and sheet pans into a row you can pull from without lifting everything above. Baking sheets, cutting boards, and trays especially belong upright. Works when: your cabinet is at least as tall as your largest pan. Fails when: you try to fit more pans than you need. It’s a space tool, not an excuse to keep six skillets.
A turntable for bottles and jars. In corner cabinets and deep shelves, a lazy Susan brings the back to the front. Oils, vinegars, and sauces are the natural fit. Fails when: you use it for tall, top-heavy bottles that tip over every time you spin it.
Pull-out drawers inside base cabinets. Retrofitted sliding shelves turn a deep base cabinet into something closer to a drawer. They cost more and require installation, so they’re a permanent change. Works when: you have deep lower cabinets and use them daily. Fails when: you’re renting or the cabinet is used rarely.
Nesting everything that nests. Mixing bowls, measuring cups, storage containers, and pots with lids flipped upside down. It’s free, and it often recovers a whole shelf.
Drawers let you see everything from above without moving anything. In a small kitchen, they’re often more valuable than cabinets.
Deep drawers for pots, plates, and dry goods. If you have deep base drawers, use them for the heavy things you’d otherwise lift from a cabinet. Plates stored upright in a peg system, pots with lids in place, or a small pantry of dry goods stored with labels on top. We go into drawer pantries in our guide to organizing a kitchen with no pantry.
Adjustable dividers in shallow drawers. One divider system for cutlery and one for your utensil kit. Buy them only after you’ve edited down to what you use, so you size them to your actual things.
An in-drawer knife block. If a wall strip isn’t possible, an in-drawer block gets knives off the counter safely.
One junk drawer, allowed. Everyone has one. Give it small dividers and a quarterly reset, and it becomes useful instead of shameful. The rule is that nothing lives there that belongs somewhere else.
When drawers fail: when they’re overfilled and have to be forced shut. A drawer that jams every time you open it is a drawer you’ll stop using, and its contents will migrate to the counter.
The space under the sink is awkward because of the plumbing, and it becomes a cave of half-used cleaning bottles.
Edit to one of each. One all-purpose cleaner, one dish soap refill, one scrub brush, one set of cloths, a box of trash bags. Most households own five partial bottles of cleaners that do the same job.
A tension rod across the top. Spray bottles hang from their triggers, freeing the cabinet floor. It’s cheap, needs no drilling, and is renter-friendly.
A two-tier U-shaped organizer or two small bins. Designed to fit around the drain pipe. Works when: sized to your actual cabinet. Fails when: bought for a generic sink and blocks the disposal or shutoff valves. Always keep those valves clear and reachable.
A waterproof liner. Not an organizer, but a small leak can ruin a cabinet floor before you notice it.
A small kitchen often has a small fridge, and a cluttered one is where food goes to be forgotten.
Zone it like a cabinet. Leftovers and ready-to-eat food at eye level. Raw meat and fish on the lowest shelf, where drips can’t reach anything else. Produce in the crisper drawers. Condiments in the door, where it’s warmest.
Use clear containers for leftovers. If you can see it, you’ll eat it. This is where matching glass containers earn their place.
One “eat first” bin. A small tray or bin for things that need using soon. Everyone in the household knows to look there before cooking or snacking. It’s one of the simplest ways to reduce food waste in a small fridge.
Edit the door every week. Condiment bottles quietly multiply. When you put away groceries, check the door and toss anything expired.
Keep the top of the fridge clear if you can. It’s tempting storage, but it’s warm, hard to reach, and highly visible. If you must use it, one closed basket beats an open pile.
The counter is where small kitchens feel smallest. Every object on it is one less square foot to cook on. We cover the full method in our guide to decluttering kitchen counters without them feeling bare, so here are the small-kitchen specifics.
Protect one clear prep zone. Even in the tiniest kitchen, keep one stretch of counter, ideally next to the sink or stove, completely clear. This is your working surface. Nothing is allowed to live there.
Only daily appliances stay out. The kettle or coffee maker if you use it every morning. Everything else goes into a cabinet. In a small kitchen the “used weekly” threshold that works in larger rooms is too generous.
Use an over-the-sink cutting board. A board that spans the sink creates temporary prep space exactly where you need it, and stores flat.
Corral what must stay out. Oil, salt, and pepper by the stove on a small tray or board. A tray turns five objects into one visual unit and makes wiping down fast.
Small kitchens have more storage than they seem to. It’s just in places that aren’t obvious.
Inside cabinet doors. Adhesive hooks or a slim rack on the inside of a door can hold measuring spoons, pot lids, cutting boards, or foil and parchment. Works when: the items are flat and the door still closes fully. Fails when: things rattle or fall every time the door opens. Test before committing.
Above the upper cabinets. The gap between the cabinet tops and ceiling is ideal for things you use a few times a year: holiday platters, the large stockpot, the extra serving bowls. Use a few matching closed baskets or boxes, because anything open up there collects grease and dust. Keep a sturdy step stool nearby.
The toe kick. The recessed strip under base cabinets can be fitted with shallow drawers, perfect for baking sheets, cooling racks, or trays. This is a permanent, installed change, so it’s for owners, not renters.
Over the sink. A simple shelf or rail above the sink can hold a dish brush, soap, and a plant. A roll-up drying rack over the sink frees counter space where a dish rack would sit.
The side of the fridge. If it’s exposed, a magnetic rack or a few magnetic hooks can hold towels, a spice rack, or wraps. Check your fridge’s side is magnetic first, as some aren’t.
The end of a cabinet run. A narrow wall-mounted rack on the end panel of a cabinet can hold towels or a few utensils.
The space next to the fridge. A gap of a few inches can take a slim rolling cart for oils, spices, or canned goods.
Not every idea is available to every kitchen. Here’s how they sort.
| Renter-friendly (no or minimal damage) | Needs installation or permission |
|---|---|
| Shelf risers and turntables | Wall-mounted pot racks |
| Tension rods under the sink and in cabinets | Pull-out cabinet drawers |
| Adhesive hooks inside doors | Toe-kick drawers |
| Over-the-sink cutting board and roll-up rack | Open shelving mounted into studs |
| Freestanding rolling cart | Built-in appliance garage |
| Magnetic racks on the fridge side | Under-cabinet lighting (hardwired) |
| Freestanding pegboard or leaning shelf | Replacing cabinet doors or hardware |
A magnetic knife strip or a single rail usually needs only a few small screws, which many landlords accept. Ask first, and keep the hardware so you can patch and restore when you leave.
The layout of your kitchen shapes where each zone should go. Here’s how we’d set up the three most common small layouts. Adjust for where your sink and stove actually sit.
| Layout | Prep zone | Cooking zone | Cleaning zone | Storage priority |
|---|---|---|---|---|
| Galley (two parallel walls) | The counter directly between sink and stove, kept completely clear | Stove wall; pots below, utensils in a rail or crock beside it | Sink wall; dishes stored in the upper cabinet directly above the dishwasher or drying rack | Go vertical on the wall with fewer windows; use deep drawers for pans |
| L-shaped | The longest uninterrupted counter run, ideally near the sink | One leg of the L; oils and spices on a turntable next to the stove | The other leg; cleaning supplies under the sink | The corner cabinet needs a turntable or should hold rarely used items |
| Studio kitchenette (one wall) | One protected stretch of counter, plus an over-the-sink board | Stove end; wall rail above for daily tools | Sink end; a roll-up rack instead of a dish drainer | Add a rolling cart or a freestanding shelf as your pantry; a small table can double as prep space |
The principle across all three: whatever you use first when you walk into the kitchen should be the easiest thing to reach. For most people that’s the kettle, the coffee, and the knife.
Organization in a small kitchen doesn’t hold on its own. A few habits do most of the work.
The nightly reset. Before bed, spend five minutes returning everything to its home, wiping the counter, and running or emptying the dishwasher. A small kitchen shows mess faster than a large one, so it also rewards this habit faster.
One in, one out. When a new tool, mug, or container comes in, one comparable thing leaves. In a small kitchen this isn’t a nice idea. It’s a necessity, because there’s no spare space for new things to go.
The 48-hour pause. Before buying anything for the kitchen, ask whether something you own already does the job, and wait two days. This is the habit that stops a small kitchen from refilling.
Seasonal rotation. Keep only in-season gear in prime spots. The ice cream maker and the big roasting pan don’t need to live at waist height in March.
A quarterly edit. Every three months, open each drawer and cabinet and ask the same question you asked at the start. Things drift. A short edit catches the drift before it becomes a weekend project.
If you want a way to track progress, score your kitchen on the Calm Kitchen Index before you start and again a month later. In small kitchens, dimensions 1 (visual noise) and 5 (maintenance load) tend to improve the most.
How do I organize a very small kitchen? Edit first, then store by zone. Keep only what you use, put each item close to where you use it, and use vertical space (wall strips, rails, risers) before buying bins. Protect one stretch of counter as a clear prep area.
How can I get more storage in a small kitchen without renovating? Use shelf risers, tension rods, hooks inside cabinet doors, a magnetic knife strip, and a slim rolling cart. The space above the upper cabinets is also good for things you use rarely, stored in closed baskets.
What should I not keep in a small kitchen? Duplicates, rarely used appliances, bulk quantities of dry goods, and specialty tools you use a few times a year. Store seasonal and occasional items elsewhere in your home, or let them go.
Are open shelves a good idea in a small kitchen? One shelf, used for everyday items in a consistent material or color, can make a small kitchen feel lighter. Several shelves full of mixed objects tend to feel cluttered and collect grease and dust.
How do I organize pots and pans in a small kitchen? Store them vertically in a file-style rack or on a wall rail, nest them with lids flipped, and keep only the pans you actually cook with. For most people that’s four or five pieces.
What’s the best way to store a small appliance I don’t use daily? In a lower cabinet or a deep drawer near where you use it, or outside the kitchen entirely if you use it less than monthly.
How do I keep a small kitchen from getting cluttered again? A five-minute nightly reset, the one-in-one-out rule, and a 48-hour pause before buying anything new. Clutter returns through small daily drift, so the fix is a small daily habit.
Pick the one cabinet or drawer that frustrates you most. Empty it, keep only what you use, group what’s left, and put it back in a way you can see at a glance. Don’t buy anything yet.
Then do the same with the counter. Protect one clear prep zone and live with it for a week.
By then, you’ll know exactly which one or two organizers would genuinely help, and you’ll probably need fewer than you expected.
Keep reading: The Complete Guide to a Minimalist Kitchen · How to Organize a Kitchen With No Pantry · Minimalist Kitchen Essentials · How to Declutter Your Kitchen Counters
For manufacturer examples of organizing drawers and cabinets, see IKEA’s kitchen-organization guidance. Check dimensions and installation instructions for any specific product. The layouts in this guide are hypothetical planning examples, not client projects.
Sources describe their own scope and limitations. Read our sourcing policy.
Read more from the Minimalist Kitchen Living pillar.
Minimalist
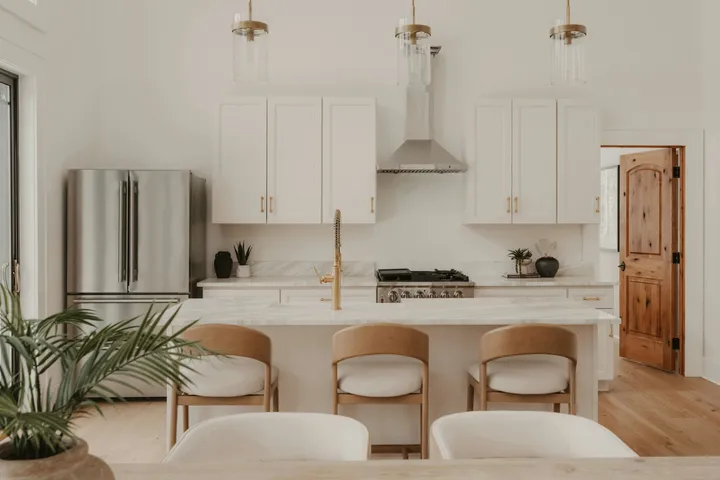
A minimalist kitchen isn't an empty one. Here's how to build a calm, intentional kitchen that still works hard for people who actually cook every day.
16 min read
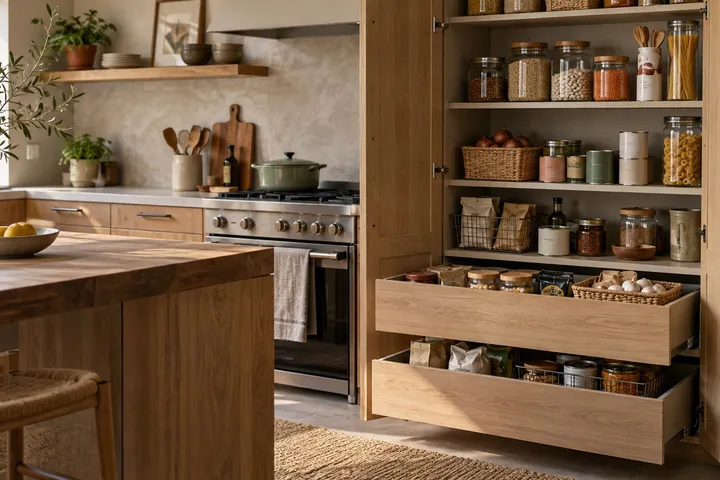
How to keep a pantry-free kitchen calm and functional: create a designated pantry zone in your cabinets or drawers, edit before you store, decant only what's worth it, and shop in a rhythm that keeps stock small.
14 min read
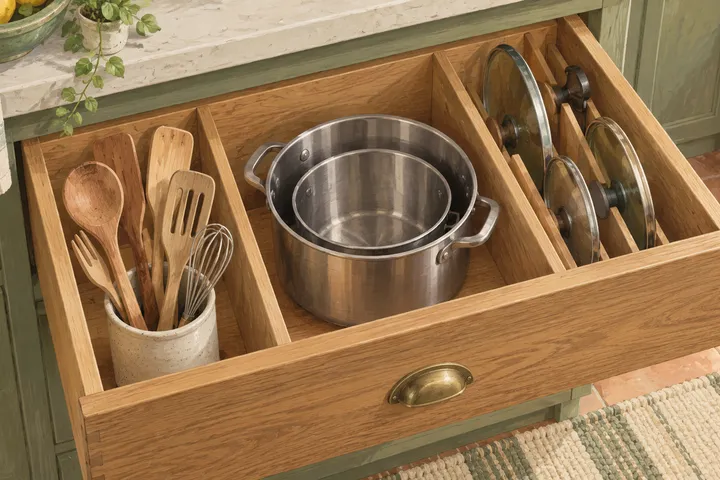
Measure usable drawer space, choose practical layouts for utensils, cookware and dry goods, and test the arrangement before buying organizers.
7 min read